Monday 31 December 2018

SDX - Cleaning the scanner glass

Sometimes we may experience problems with loading the mat or getting lines down our scans.

Firstly if you are having problems loading the mat make sure you are loading it right side up. Sometimes it is the most simple thing that will help.

However, in many cases it will mean the scanner glass needs cleaning. This is a simple task.

Friday 16 November 2018

Cutting on the SDX model of ScanNcut

Here I am using the SDX1000 to cut vinyl. No test cut and the machine is set to auto depth and speed. I have used a Cricut foil vinyl.

A point to remember: the new mats are very sticky, use with care. They do also have a low tack mat and that may be necessary to cut finer materials. If you do get something stuck on the mat, soak in warm water and gently rub off. Allow the mat to air dry. The reason I know this is because this is what happened when I was try8ing different mediums.


NOTE: Brother do not recommend cleaning your mats with alcohol or water. They say to clean it with the spatula provided and use tweezers to gently lift off any residue. They do not mention baby wipes. They also you should replace the mat when it is no longer sticky.

Thursday 15 November 2018

Overview of the SDX1000

Here is a short clip looking at the new machine, Please note I used two wrong expressions in this recording. Firstly I should have said premium functions (not previous functions). Right at the end I said SDX900 and of course I meant the CM900.


Wednesday 14 November 2018

ScanNcut SDX Models

There are now two models released in Australia of the new ScanNcut SDX models, the SDX1000 and the SDX1200. There are slight differences between the models.

SDX1000 is available at Spotlight Australia
SDX1200 is available at sewing retailers


Features
SDX1000

SDX1200

·         Standard tack adhesive mat
·         Automatic blade.
·         Automatic blade holder.
·         1 touch pen.
·         1 spatula.
·         1 bag of accessories.
·         1 power cable.
·         Storage bag for accessories.
·         LCD touch screen 12.70cm with better definition.
·         682 patterns.
·         9 different fonts.
·         Low tack adhesive mat.
·         Standard tack adhesive mat
·         Automatic blade.
·         Automatic blade holder.
·         Thin fabric auto blade
·         Thin fabric auto blade holder
·         Mini pen holder
·         Colour mini pen set
·         Erasable mini pen set.
·         1 contact sheet for application of fabric through the iron.
·         1 stylus
·         1 spatula.
·         1 accessories bag.
·         1 power cable.
·         LCD touch screen 12.70cm with better definition.
·         1303 patterns.
·         17 different fonts.
Wi-Fi connectivity
Yes
Yes
Scanning
600 dpi
600 dpi
Cut up to
3mm
3mm
Tool storage
Yes
Yes
Vinyl Roil Feeder adaptable
Yes
Yes
Us existing mats
No
No
Use existing blades
Yes but no automatic depth
Use Premium Functions (stamps, embossing tool, stickers, rhinestone, foiling, enhanced image tracing)
Yes
Yes


My purchase was the SDX1000 as I do not cut fabric and so those extras were not what I needed.

This worked straight out of the box, some of the commands are rearranged on the machine, I will write a post on that soon. Brother even enclosed a sheet of cardstock for you to cut something straight away.

Tuesday 13 November 2018

Dimension using vinyl

I love using vinyl on my cards, particularly foil vinyls. However, the result is always flat and I like a little bit of dimension. So I thought I would have a play.

Today I had some birthday cards to do and cut the happy birthday for the front in foil vinyl. The paper I was usuing as embossed and I thought how great it would be to raise the vinyl.

I cut and weeded and lifted the vinyl as normal.


I then cut the same project in white cardstock and carefully laid it on the back of the vinyl, you can carefully lift and adjust as necessary.


The using a wet glue and a fine applicator I glued the back of the paper, using a wet glue allows a little bit of wiggle room.


I tried two and three layers, I liked the three layers best. I simply glued between layers and the glued the last layer. I then laid the whole thing on the card and used the vinyl tools as normal, carefully rubbing across to get it to adhere to the cardstock.

The end reult looked great although the image does not do it justice. Here it is with two layers


Now with three layers


Very happy with the dimensional effect.

Friday 9 November 2018

Using the Embossing Tool for fold lines

If you have purchased the Embossing Kit for your ScanNcut, here is another way to use to use the kit.

We usually use a kiss cut line for folds and this works well. Sometimes, however, this will easily tear or does not give a crisp fold. An alternative to this is to use the Embossing Tool.

First step
Create project


Second step
Send as normal to your SNC

Third step 
Open as normal with paper on normal mat

Fourth step
Emboss line
Send your design to your SNC as normal. Open Embossing options


Select Line Embossing


Check your settings

As I am doing straight lines I choose a faster speed. I use the 1.5mm tool.


Using the back key at the top return to your pattern screen and cut as normal. Here is the difference between a kiss cut line on the right and an embossed line on the left.


Tuesday 11 September 2018

Friday 7 September 2018

Twist and Pop Card

Making this fun card is very easy project. I have created an FCM file for you to cut on your ScanNcut, download free file here. The pattern is for a 10.5 x 14.8 card base. There are two mechanisms and two popup panels in the zipped file. One is with lines you can emboss on the ScanNcut and the other is with kiss cut lines. Just choose your preferred method.


After cutting you have the pieces shown below. The mechanism to make it pop out is the white cross shape. The blue is the pop out panel and the patterned pieces are for the card front and insides. When cutting the patterned pieces check the direction of the paper and cut accordingly.


Start with the mechanism and fold the cross fold lines diagonally and down the centre, crease well. Then close and crease the fold lines again. Open the mechanism and add strong tape on the arms, top one side, bottom the other side.


Carefully centre the tip of the folding mechanism with the centre of the card base and adhere with strong tape or other adhesive.


When one side is placed correctly place adhesive on the second side and close the card. Press well. When the card is opened now the card will unfold. Carefully adhere the patterned piece on top of the base while the card open, repeat for top and bottom.

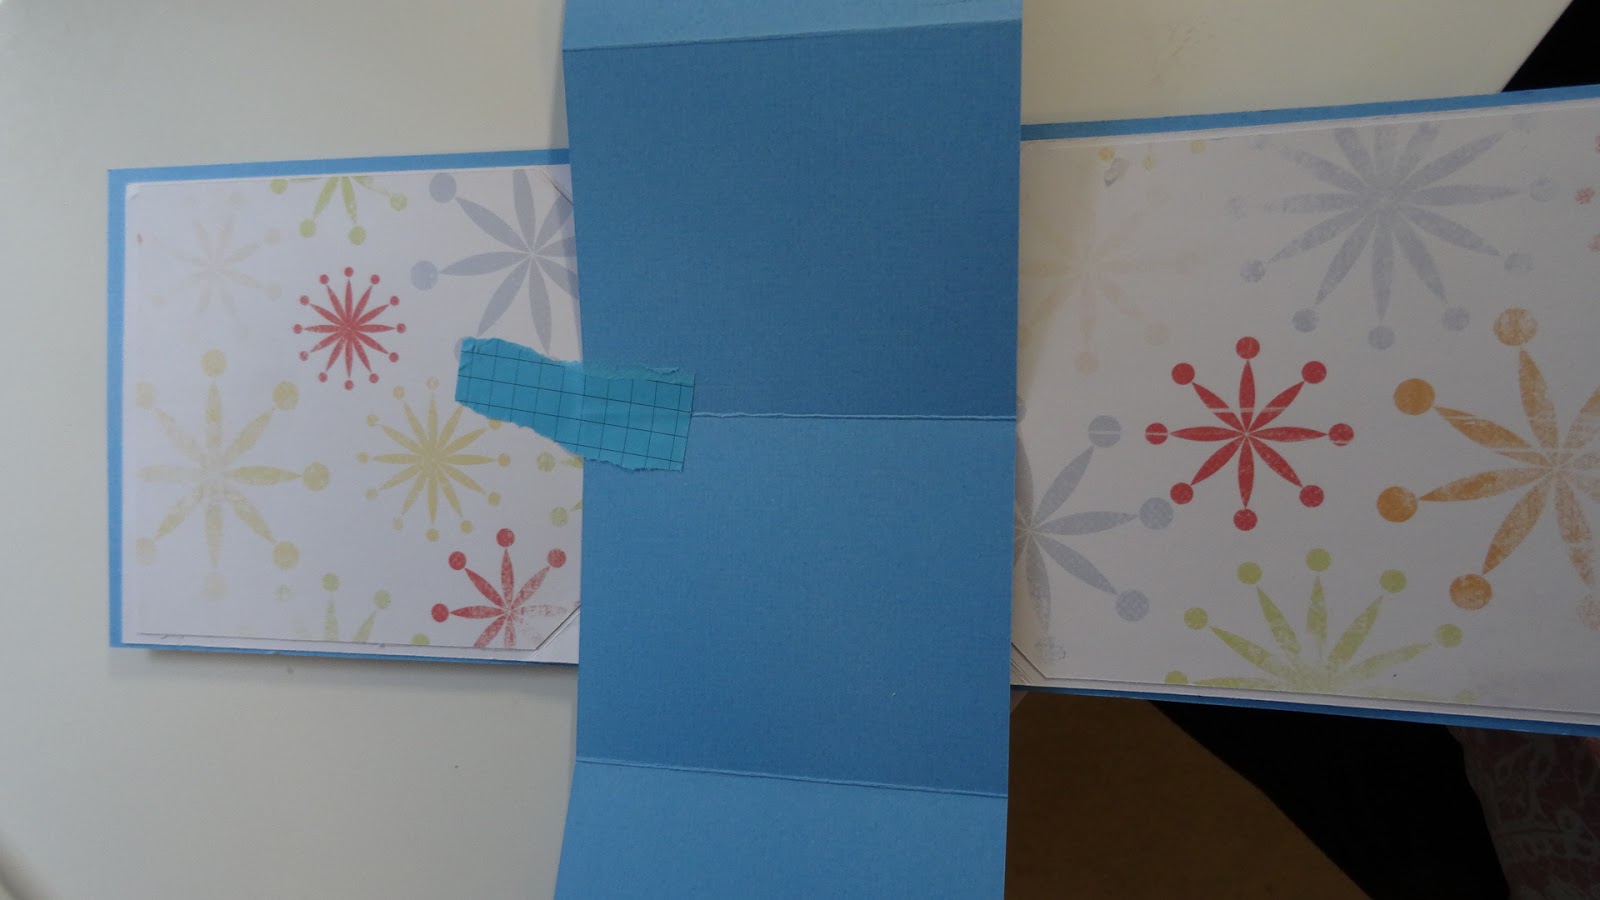
Now is the time to add the popup piece. Making sure the centre fold is in the centre of the card adhere with post it tape to hold in place.


Starting from either side fold the outer square to the centre. Peel the backing layer of the tape and lay the panel flat across the tape. Repeat for second side.


Opening and closing the card will now create the 'twist and pop'. Decorate as desired.

Friday 17 August 2018

Creating a Stained Glass effect

A project I am creating some baby nightlights. I wanted to use some transparent vinyl (can be purchased here or other good vinyl suppliers). The end result will look like this.


To create the bear I used Sure Cuts a Lot 5.


After cutting and weeding both the outline and transparent pieces I use my transfer tape to pick up the outline and carefully lay over the transparent pieces. Rub down well and lift both vinyls off and lay down in position. The smaller pieces of the balloon can be added with tweezers.


Wednesday 15 August 2018